What You Need:
- Nail Polish Remover
- Q-tips
- toothpicks
- paper towels
- disposable cup filled with water
- at least two different colors of nail polish
- a white or light color for a base coat
- a top coat of some sort
- Vasaline or Scotch tape if you don't like the mess
Step 1:
Remove any old Nail Polish - Simple enough
Step 2:
Apply white or light colored base coat - don't be concerned about keeping the edges of it clean or making it a thick coat. This is meant to just be one quick - thin coat of nail polish - it's going to get a bit messy anyways
*If the top coat is too dark you will not be able to see the swirls when you dip you nails*
Step 3:
Make sure the tops are all completely loose on the colors you want to use so you can just lift the cap off later without having to unscrew it which takes too much time
Also try and make sure that your nail polish drips freely from the brush. Older nail polish will be much thicker and won't drip and nail polish that is almost empty won't drip well either because not enough nail polish will cling to the brush when you pull it out.
* This is an important step because you want to be able to drip the nail polish fast so it doesn't dry*
Step 4:
Let the nail polish drip onto the surface of the water
*do not hold the brush too high from the surface because then the drop of nail polish will break through the surface and sink to the bottom of the cup. Do not worry if this happens, though, just drip the nail polish again closer to the surface.*
This simply shows what the nail polish will look like as it spreads out across the surface of the water. The farther it spreads, the quicker it spreads
Try to keep dripping the colors so it begins to form a bulls-eye in the cup
*Remember do this fast or it will dry*
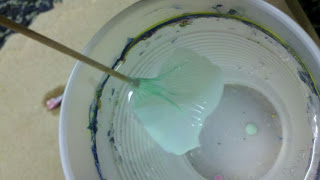
This is an example of what will happen if you let it dry. Sometimes a film will also develop between dips, all you need to do is take a toothpick to the surface of the water to remove the film
Step 5:
use a toothpick to 'swirl' the colors together. Don't take a whole lot of time to do this - the nail polish will dry
(I ended up changing my mind from gold to silver nail polish)
Step 6:
When you go to dip your finger in, bend it so that the nail faces the water and gets a good spot of nail polish on the nail. Push your finger all the way through the water and pull it straight out.
Don't be surprised when you have nail polish around the nail and on the knuckle. If you want to prevent this, use vasaline around your finger nail or scotch tape around your nail. I don't use either because it seems to be just as much trouble if not more than cleaning your finger off afterwards.
Step 7:
Don't forget your top coat!
Step 8:
Don't be scared of the mess! :)
I usually put some nail polish remover in the cap from the nail polish remover bottle and use the Q-tips to clean off the nail polish around the nail. You won't get all of it off but you will get a majority. The rest will come off after your nails completely dry and you shower.
All done!
Hope you liked my first tutorial!
*Sam*


Great job Samantha on your first tutorial, can't wait to see you on Easter.
ReplyDeleteLove,
Mima